Getting Started with Google Cloud
Now that you know what the Cloud is all about, and you've decided to start your cloud computing journey with Google Cloud. Let's take a dive into actually getting your hands dirty with GCP.
There are two resources that I recommend from Google Cloud, namely:
Cloud Skills Boost by Google Cloud
Google Developers Codelabs
Our focus will be on Cloud Skills Boost, since it's more focused on cloud and has way more resources.
Google Cloud Skills Boost
Google Cloud Skills Boost is where you can access Google Cloud’s entire catalog of labs and courses. You can discover learning paths, build in-demand cloud skills, track your activity progress, and validate your knowledge with badges. Each path consists of courses, each with several resources, from video tutorials to hands-on labs on a particular topic.
Navigating Cloud Skills Boost
Once you've created an account on Cloud Skills Boost, you're welcomed to a ton of resources to choose from. Google has made it easy to pick the resources you'd use and in what order. In the "Paths" section, select a path that resonates with you, and you'll find several resources, already in a recommended order, for you.
As I mentioned earlier, every course in each path either contains video tutorials, hands-on labs, or both. For the tutorials, you can watch them directly like any other YouTube tutorial, but make sure to take notes. There are always quizzes that you need to pass to get your badge of completion.
Google Cloud Self-Paced Labs
Labs are resources on skills boost that allow users to gain hands-on practice with the Cloud Console, an in-browser UI that lets you access and manage Google Cloud services.
Labs are also pretty straight-forward once you read the instructions, but I'd give a short walkthrough all the same. Once given a lab, there are special instructions needed to go through them. The interface of any lab usually looks like this, with details differing from lab to lab.
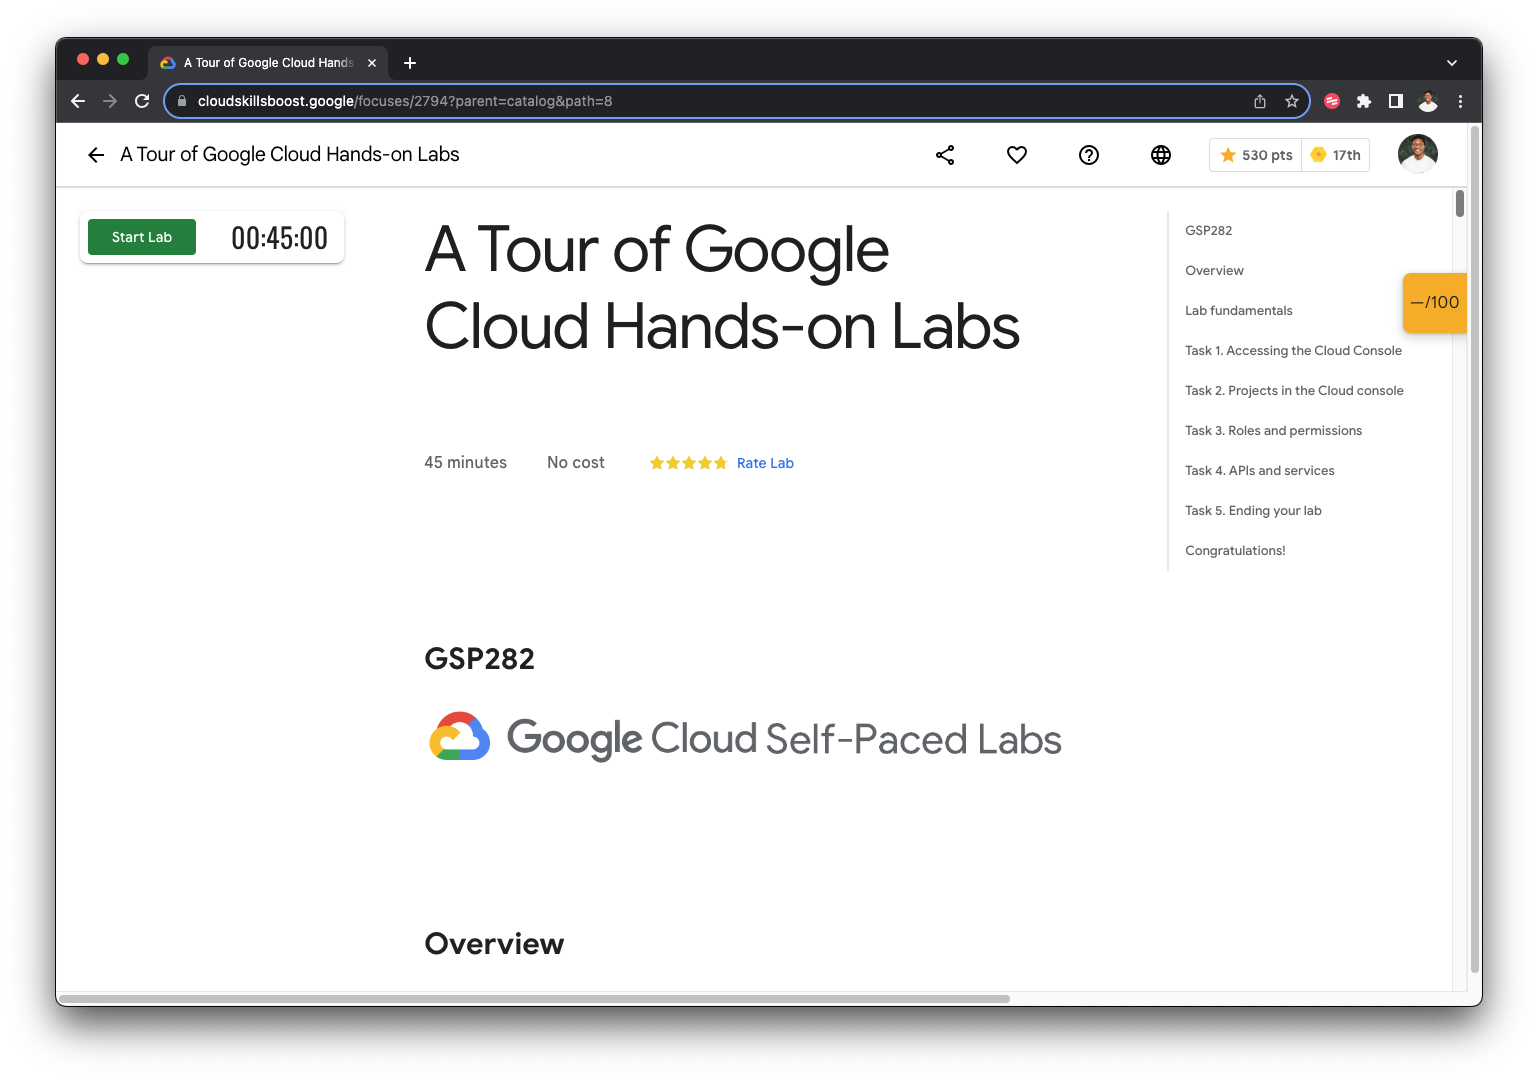
There are a few key things to note on this screen.
The lab title: This is the title of any lab that you're given.
Lab time: This is the time allocated for that lab. Each lab is given sufficient time to complete it. Once that time elapses, the session will close, and you'll lose access to your work, so remain focused.
Price: While some introductory labs are free to use, the more complex labs come at a cost. The paid labs are paid for with credits. Skill Boost gives new users 200 credits to start, with each credit being worth a dollar. Once those credits finish, you'd have to get more, either by buying some, being gifted some, or getting them from arcades.
Score: Many labs come with a score, which is counted by activity tracking. To complete a lab, you need to get all the scores, and to get all the scores, you need to complete all tasks in order.
Start lab button: Clicking this button creates a temporary Google Cloud environment with all services and credentials enabled. This button also starts a countdown.
Once the lab environment is running, a Lab details will pop-up on the left. It contains an Open Google Console button, credentials (username and password), and a Project ID field.
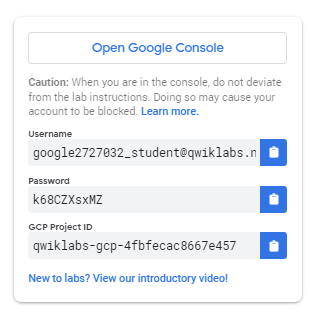
Open Google console
This button opens the Cloud console, the web console, and the central development hub for Google Cloud.
Username and Password
These credentials represent an identity in the Cloud Identity and Access Management (Cloud IAM) service. This identity has access permissions (a role or roles) that allow you to work with Google Cloud resources in the project you've been allocated. These credentials are temporary and will only work for the access time of the lab. When the timer reaches 00:00:00, you will no longer have access to your Google Cloud project with those credentials.
Project ID
A Google Cloud project is an organizing entity for Google Cloud resources. It's a part of the resource hierarchy (Organizations, Folders, Projects, Resources) which we'd talk about later. It often contains resources and services; for example, it may hold a pool of virtual machines, a set of databases, and a network that connects them together. Projects also contain settings and permissions, which specify security rules and who has access to what resources.
It's advisable to open the Cloud Console through an incognito window. Once you're logged in with the credentials, you can now follow the instructions in the lab.
Navigating the Cloud Console
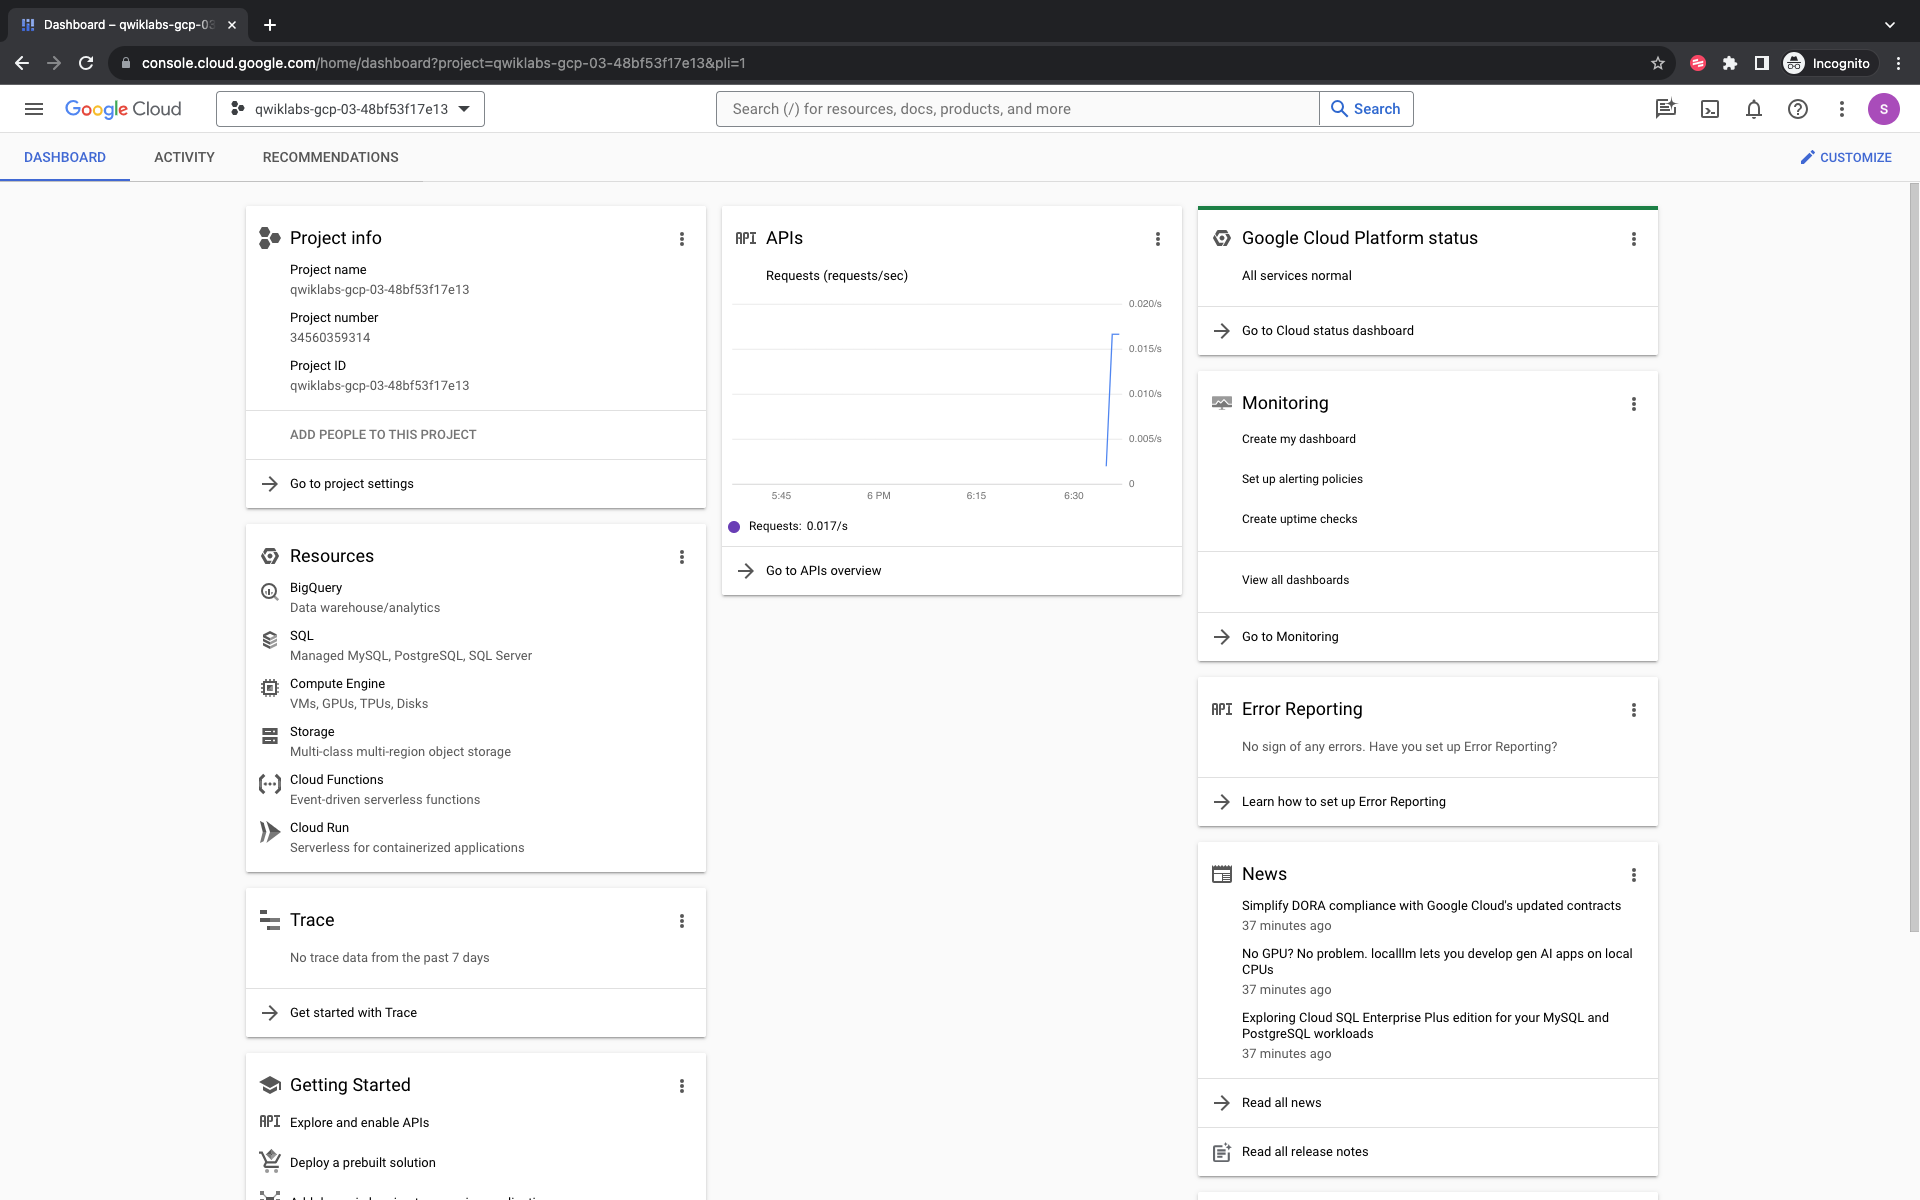
For a high-level overview, there are four sections I consider important to note.
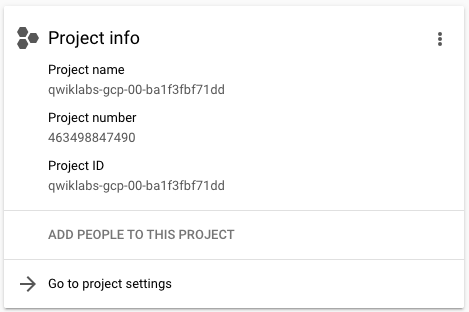
The Project Info menu
Located in the upper-left corner of the central pane is the Project info menu. This contains all the details about the current project.
To view all projects you have access to, click the drop-down menu next to your project name in the Google Cloud console title bar.
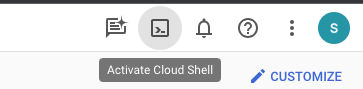
The Cloud Shell button
The Cloud Shell is an interactive shell environment for Google Cloud that lets you learn and experiment with Google Cloud.
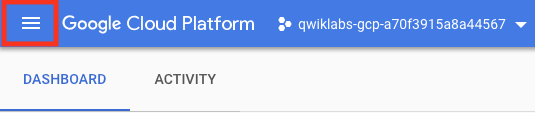
The Navigation menu
The navigation menu provides quick access to all of Google Cloud's core services. The icon appears as three lines in the title bar.
The search bar
If you're having trouble finding any resource, document, or product, or you just want to save time, the search bar is there for you. It's a shortcut to gain access to whatever you need on the cloud console.

There's a lot more you can do on cloud skill boost like gather badges, rank up on leaderboards, and learn far and wide, but this article just gives a high-level overview of navigating the resource to begin your learning journey. I hope this helped.
Kindly leave a comment if this helped, and feel free to suggest what you'd like me to talk on next.